Thursday, 17 March 2016

Shoot 3 - Boiled Film

This shoot was taken in Bournemouth on a trip. I boiled the film then took the shots. I used a agfa super silette which is a rangefinder and it is fully manual and I find it easy to focus quickly so I use it for street photogrpahy, although I have to worry about the settings as its manual. I used an old film I found with a 200 ISO. I was looking at Mathew Cetta and another technique he had used to destroy his film, boiling. I did this before I shot the roll, I found that this was not as sticky as the lemon juice shoot which as a consequence didn't stick, so I got no double exposures this time. I boiled the film for 8 minutes, This came out with great effect. The range of colours go from purple tinge to blue to yellow. Which is the first 2 layers of the colour film, and would like to see if I can break the green layer next time. I used this time due to a lomogrpahy post by the user Dopa  which showed how to get the effect he got, although all his shots were blue and mine had a range of colours.
I liked the shoot due to the randomness of the the boiling, as it adds a sense of excitement to the shoot. I think that my favourite picture is of the girl on a train with a purple tinge and smudge on it. I like it as its a portrait, and I don't to them often and her head if framed by the smudge, which is going on a diagonal across the page.
This shoot went well as it really distorts the images enough that the colours look like they bleed into the reality of the image. I would like to experiment with other lenses which exaggerate the image such as fish eyes and wide angle lenses to extend my idea of changing the truth through post production techniques I can do

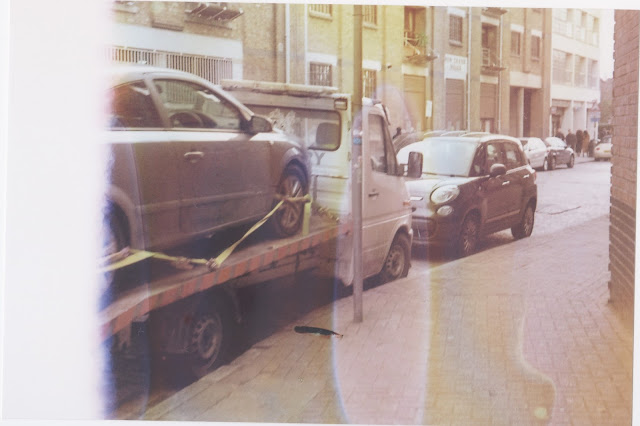
This picture was one of the first ones I took, but was right next to where I opened the back of the camera.

This is blurry picture but the colours on the top look like they are bleading through. And I was walking while I took the shot.

This is my best endit, only the first layer was destroyed as it has only gon purple.

Thursday, 10 March 2016

Shoot 2-Double Exposure

The second shoot I took when in the alps skiing. I was looking at Miki Takahashi who created self portraits using double exposure, altho using a digital camera and post production. To make mine pre-production I looked into film cameras and I used a Lubitel-166 which doesn't have a double exposure lock so I was able to create double exposures without having to manually wind back the film, which can be inaccurate. In some picutres I forgot to lower the settings on the camera so one of the picutres looks more dominant than the other, but this makes it looks more dreamlike. 
I found that it is very hard to plan for double exposures when you are constantly walking around, as you forget where you framed a Person in relation to the landscape.
The idea was to take pictures of people and link them to the land around them and what they were doing, also making it look very ethereal and dream like. I think I achieved this. My best edit is one of the ones in the snow or the girl at the station as it was framed well and doesn't look out of place like some of the others that were framed differently. I found that the limitation of the 120 film only having 12 pictures hindered the number of pictures I could take with double exposure so next time I would like to try with 35mm but work out a way to keep the double exposure without winding back and guessing where the frame is.
For my next shoot I would like to look into more film destruction with different chemicals.


Behind the Boiling

This is a cut down version of the order of the film. After I got the pictures back I discovered that the the pictures were less effected the further you went into the film. So I have researched the layers of a colour film which confirms my thoughts. I have colours from yellow to blue. So the yellow are the dirst pictures I took where the grades of blue are later. and the last few picutres were not affected at all. In the fututre I want to go down further in the layers, so I get more greens and reds in the picturse. Different chemincals will give different effects due to how far down it erodes. So using different chemicals would change your timings so you get random results.

Tuesday, 8 March 2016

Experiment - Double Exposures with Film Destruction

This is 3 pictures, It was taken in 2 different locations and was purely an accident. I was planning on doing this at a much later date once I had worked out if film destruction worked. This happened due to the lemon juice becoming sticky after I soaked it, It would get suck when shooting the film, It was lucky that it didn't rip or just never move on. The colours on this have been heavily effected by the lemon, due to the purple tinge.
This is 3 pictures on top of each other, 2 girls posing and another over the top, and my laptop over that. I like this one due to how normal it looks, also unaffected by the lemon it is, as the colours are relativity normal